Table of Contents
ToggleThe importance of inspection of injection molded parts
Quality inspection of injection-molded parts is crucial for ensuring the performance and reliability of plastic products. Plastic products are used in various fields such as automobiles, electronic devices, and household appliances. Consequently, their quality directly affects the performance and durability of these products. Quality inspection is not only an examination of the product’s appearance but more importantly, a means to ensure its functionality and safety. This process reflects the manufacturer’s production level and quality management capabilities.
For injection-molded products, meeting stringent appearance and functional requirements is essential, particularly in terms of matching dimensions with corresponding parts. Even minor defects can lead to a decline in the overall performance of the product or cause malfunctions. Therefore, precise and systematic quality inspection is key to guaranteeing high-quality products. This ensures their stability and reliability in practical applications.
Key Inspection Aspects in the Production of Plastic Products
Typically, we implement these quality control procedures during various stages of the production:
1. DFM and Mold Flow Analysis: Before the production of molds, it is essential to study and confirm the maturity of product design and mold design. It is crucial to identify potential injection molding defects and strategize ways to minimize their risks.
2. Material testing: Sometimes, before producing plastic products, performance testing of materials is needed to ensure they meet the requirements and that their calibration parameters are accurate.
3. In-Process Inspection: During the production process of plastic products, the primary areas of inspection are appearance and dimensional accuracy.
Appearance Inspection focuses primarily on the surface quality of the product. This includes checking whether the color of the product is consistent, whether the glossiness meets the required standards, and whether the surface is smooth and free from flaws.
Dimensional Inspection involves precise measurements of dimensions that are vital for the assembly or use of the product. Tools such as calipers and go-no-go gauges are often used in this process. The accuracy of these dimensions is critical to ensure the product can correctly integrate with other components and maintain its overall functionality.
Of course, some products may require additional testing, including destructive testing. However, through these two types of inspections, the quality of plastic products can be effectively guaranteed to meet the expected standards during production, thus ensuring the performance and reliability of the final product.
Appearance Inspection of Products
During the appearance inspection process of products, manual visual inspection is commonly used. When there is a high volume of production, to ensure accuracy and improve efficiency, camera systems combined with artificial intelligence technology are employed for inspection.
requirements for the light enviorement
Adequate natural lighting is certainly the most ideal. When artificial lighting is necessary, it needs to meet the following conditions:
The lighting conditions in the inspection environment must meet specific standards, which include:
Light Source Color Temperature: The light source should conform to customer or standard requirements, typically choosing a color temperature of 5000K or 6500K to simulate natural light. This aids in accurately observing the product’s color and texture.
Color Rendering: The color rendering index of the light source should be higher than Ra>90, to correctly and clearly display the product’s true color.
Brightness of the Light Source: Appropriate brightness is key. Generally, the illuminance of reflected light should be around 2000Lux (+/-500Lux), and the brightness for transmitted light should be about 1270cd/m², facilitating detailed observation.
Uniformity of Illumination: The lighting should be uniform, ensuring that the brightness at any point on the illuminated surface is not less than the central brightness, to evenly observe the entire product surface.
Appearance inspection items
Specific aspects of appearance inspection focus on the following:
Color and Gloss: The color and gloss of the product are checked for consistency with the standard sample (master sample). This can be done through manual visual inspection or using a colorimeter, noting that a flat area of the product is required for colorimeter testing.
Surface Quality of the Product: Careful inspection is conducted to ensure the product’s surface is even and uniform, and free from scratches, flow marks, weld lines, splay, warping, bubbles, deformation, or injection molding defects. These issues can affect both the aesthetics and functionality of the product.
Through these detailed inspections, the appearance quality of products can be effectively ensured, meeting production standards and customer demands.
Dimensional Inspection of Products
Dimensional inspection of products requires more time, deeper professional knowledge, and greater analytical and technical skills compared to appearance inspection. Dimensional inspection can be categorized into two types:
Contact Measurement involves tools such as calipers, micrometers, and coordinate measuring machines (CMMs). The first two methods demand considerable experience and carefulness from the operator to ensure accuracy, while CMMs require programming and time-consuming setup. Additionally, due to physical contact, these methods might slightly deform the product, affecting the accuracy of the measurements.
Non-Contact Measurement utilizes tools like projectors, image measuring instruments, and scanners, measuring products optically or electronically. Although this method has some margin of error, it is more suitable for tiny parts or very small details that traditional methods cannot accurately measure.
Utilizing inspection gauges to offset part deformation
Given the softness and elasticity of plastic, precisely measuring its dimensions can be particularly challenging, especially for larger products or areas requiring precise fitting. For example, when measuring a circular fitting surface, the slight deformation in injection-molded products may cause the circle to appear slightly elliptical. Contact measuring tools like calipers might show slight variations in diameter at different points, but the average diameter may still be within acceptable limits.
Metal Inspection Gauges
In such cases, specially fabricated CNC machined metal gauges can be used for measurement. These gauges, crafted according to the exact contours of the plastic parts, can more accurately reflect the actual dimensions of the product as they eliminate the influence of bending or deformation. This method allows for a more precise grasp of product dimensions, ensuring they meet design and functional requirements.
Example 1
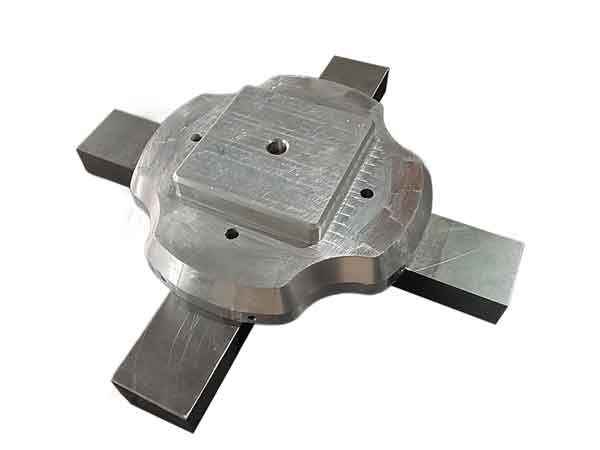
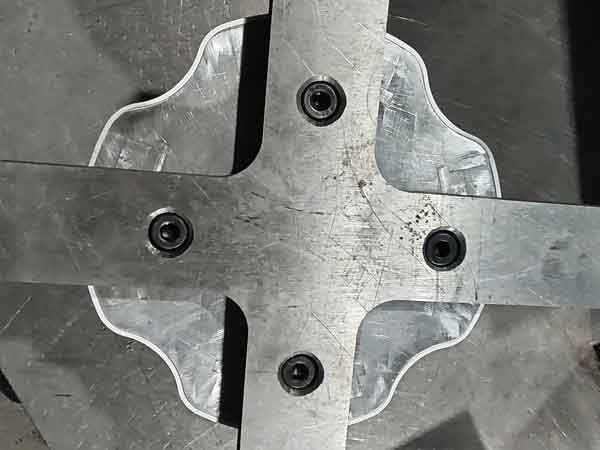
Example 1 provides a great practical instance. By using this inspection gauge, we can check the tightness or looseness of its fit with corresponding parts. Its fitting surface follows the contour along the entire circumference.
Due to such a wide span, coupled with the product’s potential moderate deformation within reasonable limits, it becomes challenging to precisely measure its contour dimensions using calipers or a coordinate measuring machine.
When we use the inspection gauge shown in the picture for measurement, we can feel the tightness of the fit and visually assess if the contour aligns perfectly with the gauge. This method helps us to detect the presence of any local uneven shrinkage.
Example 2
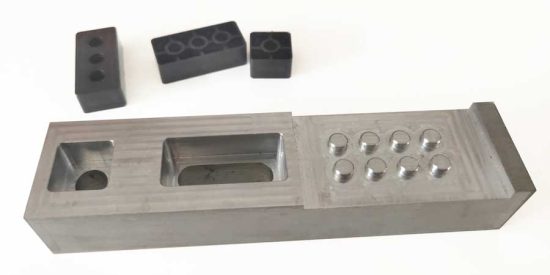
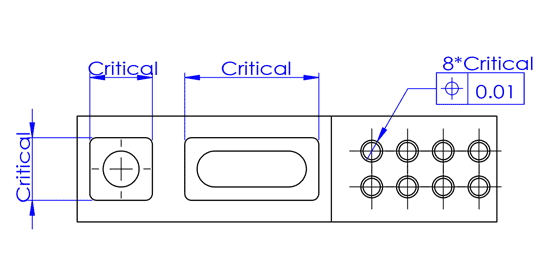
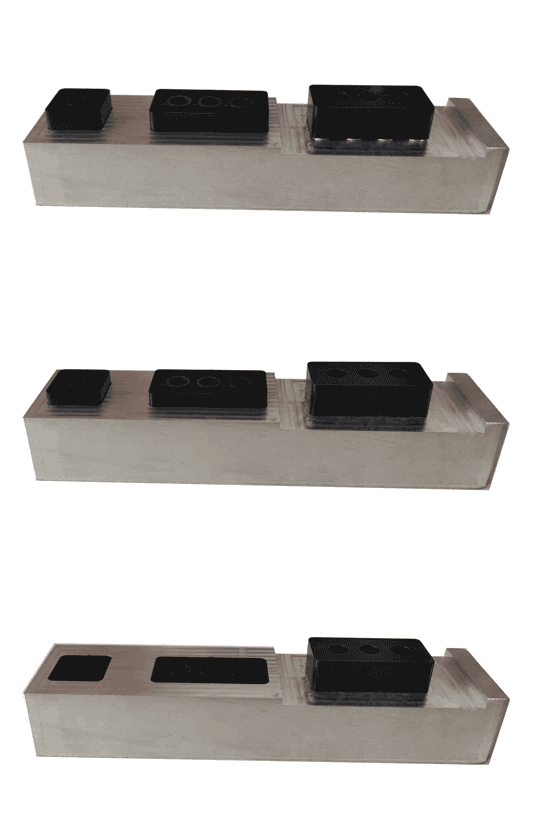
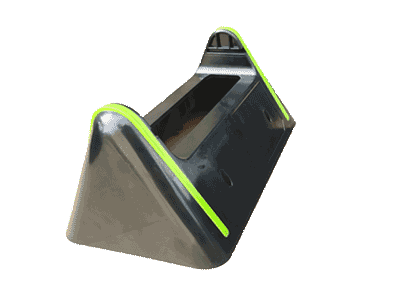
Example 2 is somewhat similar to Example 1. Both products need to meet multiple assembly relationships.
However, for thin-walled rectangular parts, there might be a slight inward warping in the middle section, leading to smaller measurements when using calipers. Therefore, using such inspection gauges yields more direct and accurate results, as the elements they test are the same as those in the actual application scenario.
3D printed plastic gauges
For situations where precision requirements are not extremely strict, such as tolerances within +/-0.10-0.15mm, 3D printing technology can be considered for creating samples, followed by CNC machining of metal gauges. This approach is cost-effective and rapid, with 3D printed samples usually completed within 1-2 days, significantly speeding up the entire production process.
Example 3
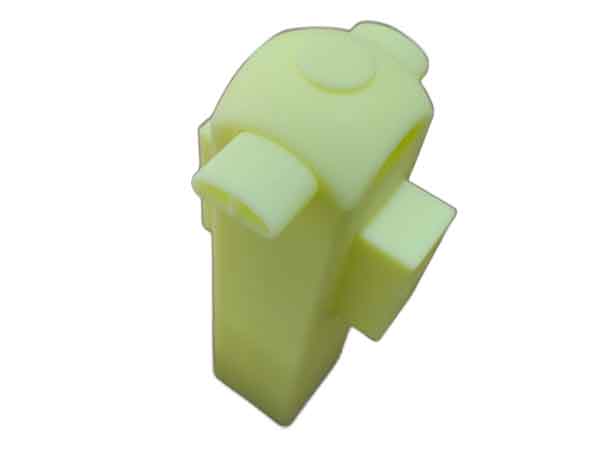
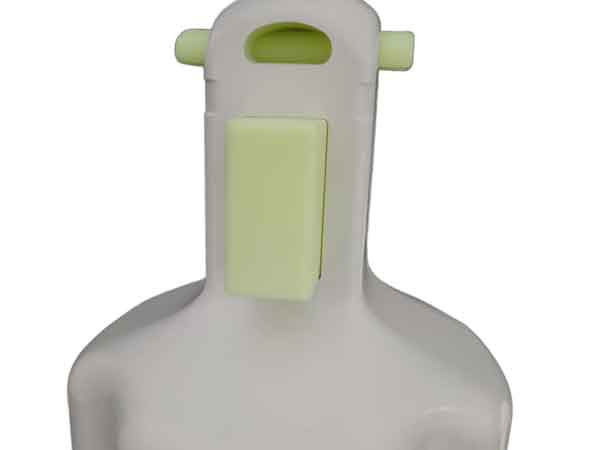
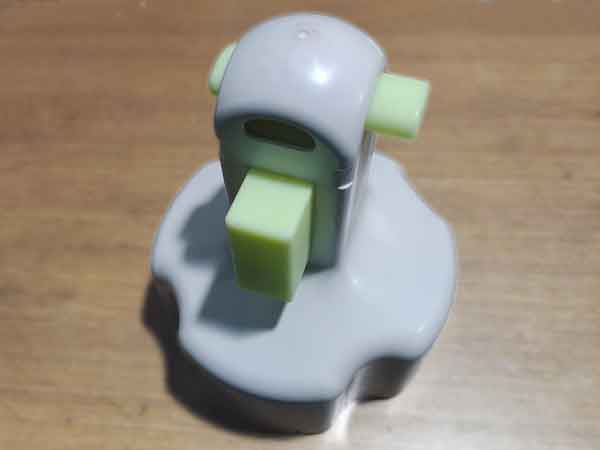
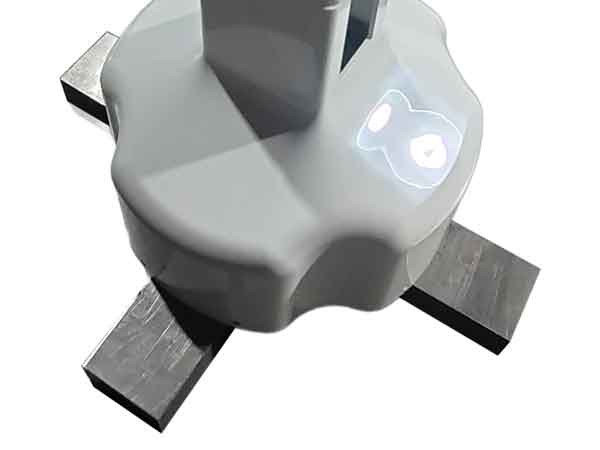
Example 3 provides an instance of inspecting dimensions related to assembly. The positioning and size of the openings in this part are directly linked to the assembly process.
The illustrated inspection gauge accurately captures the relevant dimensions based on assembly benchmarks, allowing for quick verification of the product’s dimensional reliability without needing to assemble the entire product.
In this assembly context, a deviation of ±0.15mm is acceptable, and 3D printed plastic samples can generally achieve this level of precision.
The design of these gauges is a critical aspect of the dimensional inspection process. Well-designed gauges not only measure dimensions accurately but also enhance inspection efficiency and reduce production costs. The design should consider specific product features and measurement needs, ensuring the gauges meet accuracy requirements and are practical for use on production lines. They act as substitutes for fitting parts to check key dimensions.
Using gauges to measure the fit of parts can provide an intuitive sense of how tight or loose the fit is, but it cannot offer a quantified measurement. Therefore, each inspection requires careful assessment of the fit, which inevitably involves subjective judgment. Sometimes, it’s more effective to combine the use of gauges with a caliper.
Additionally, assessing the fit based on tightness is a reasonable approach. Manually defined dimensional tolerances may not always represent the most ideal fit. This method helps in finding the most suitable tolerance range for the fit.
Conclusion
In conclusion, effective quality inspection of injection molded products, encompassing both appearance and dimensional checks, is crucial for maintaining high standards in production. Utilizing a combination of manual and advanced technological methods ensures accuracy and efficiency.
The challenges posed by the nature of plastic materials, like softness, elasticity, and shrinkage in the molding process, necessitate precision in measurement techniques and tool design. By adopting these rigorous inspection practices, manufacturers can guarantee the reliability and functionality of their products, meeting both industry standards and consumer expectations.
