Table of Contents
ToggleTypes of Printing on Plastic Parts
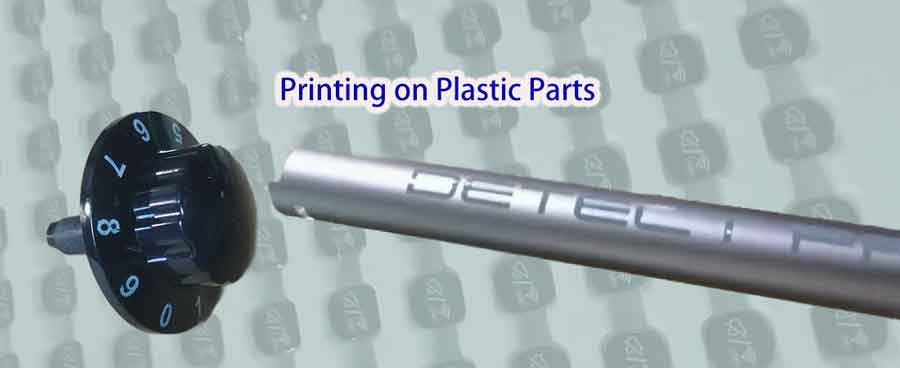
During the production of plastic items, it’s typical to print a range of designs or text onto their surfaces to boost their visual appeal. This often involves adding elements like corporate logos, product model numbers, and various other patterns or artworks.
Presently, a variety of techniques exist for applying these prints to plastic parts. Among them, screen printing, pad printing, and laser etching stand out as the most widely used methods.
Screen Printing
How Screen Printing works
Screen Printing operates on the basic principles of “blocking” and “ink permeability.” This process can be broken down into several key steps:
1. Creating the Screen Frame: Initially, a frame is needed, typically made of wood or metal. A screen mesh, usually a fine nylon or polyester mesh, is stretched tightly over this frame.
2. Applying the Photo Emulsion: A layer of photosensitive emulsion is evenly applied to the screen. Once exposed to light, this emulsion hardens, while the unexposed areas remain soft and can be washed away with water.
3. Exposure: The prepared design pattern (usually a black design on a transparent film) is placed over the screen coated with the photo emulsion, and then it’s exposed to light. After exposure, the areas of the emulsion under the design remain soft.
4. Developing: Post-exposure, the screen is washed with water. The unexposed emulsion is washed off, revealing the details of the pattern. This way, ink can pass only through these unblocked parts of the mesh.
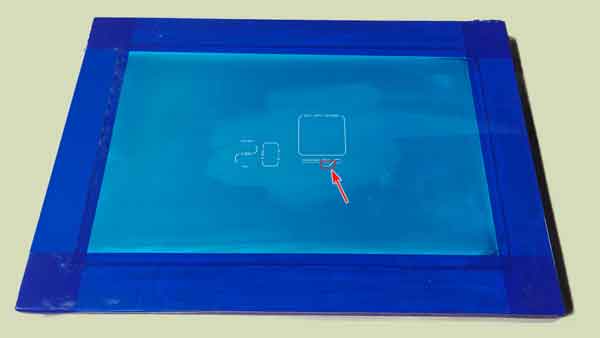
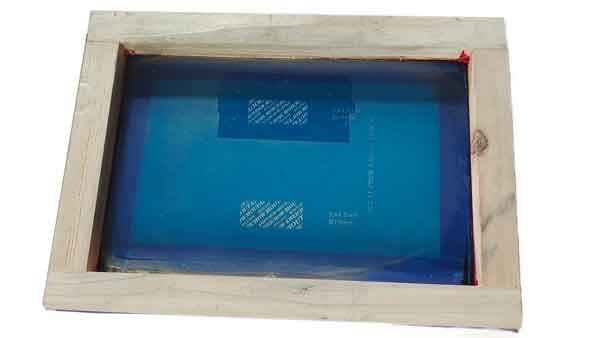
The image displays the overall appearance of the entire screen printing frame, along with a close-up of the mesh structure on the frame.
From the picture, it’s evident that the mesh areas corresponding to the design are open, allowing ink to pass through, while the other areas have been covered with a photosensitive emulsion, blocking the ink.
5. Printing: The screen is positioned over the material to be printed on. Ink is poured over, and a squeegee is used to evenly press the ink through the unobstructed areas of the mesh onto the material.
6. Cleaning and Reusing: After printing, the screen is thoroughly cleaned to remove all ink and emulsion, making it ready for future use.
Screen Printing Examples
Advantages of Screen Printing
Versatility: Screen printing can be applied to a wide range of materials, such as paper, plastic, metal, glass, wood, and even fabric.
Durable and Thick Ink Layers: The ink layer in screen printing is thicker compared to other printing methods, resulting in more vivid colors with good lightfastness and wear resistance.
Vibrant Colors: Due to the direct transfer of ink from the screen to the material, the color saturation is high, leading to striking effects.
Cost-Effective for Mass Production: Screen printing is highly cost-effective for large-scale production. Once the template is established, it allows for rapid and economical replication.
Disadvantages of Screen Printing
Printing Surface Limitations: The area for screen printing should be as flat as possible. Uneven surfaces can lead to uneven ink distribution. Excessive indentations can prevent the screen from making proper contact, hindering printing.
Challenges with Cylindrical Surfaces: While screen printing on cylindrical surfaces is possible, it requires the screen to move in sync with the rotation of the product, increasing complexity and cost. This method is less suitable for small-scale production.
Volume Requirements: Screen printing is generally more suitable for large-scale production due to the need for jigs and fixtures to position the products during printing. There are simple and comprehensive fixtures for small and large volumes, respectively. Manual positioning with simple fixtures can have a higher error rate.
Color Limitations: Each color requires a separate screen. Typically used for single, double, or triple colors, an increase in the number of colors can raise production difficulties and costs, with the added risk of misalignment between different colors.
Resolution Limitations: Compared to other printing technologies like digital printing, screen printing offers lower detail and resolution.
Cleaning and Maintenance: Regular cleaning and maintenance of the screen are necessary, especially in high-intensity production environments.
Environmental Concerns: Some solvents and inks used in screen printing can be harmful to the environment. It’s important to ensure that the inks comply with environmental standards such as RoHS and REACH.
Ink Curing Processes
Ensuring Durability Through Curing For inks to achieve optimal adhesion and durability, a curing process is essential. There are two main types of curing methods:
Thermal Curing: In this method, the printed items are placed in a constant temperature chamber. They are exposed to far-infrared radiation or heated with hot air, triggering a thermal reaction that cures the ink. The temperature is generally controlled between 60°C to 100°C, and sometimes it may reach about 150°C.
Generally, higher curing temperatures can yield better printing results. However, high-temperature treatment can lead to shrinkage and deformation, so it all depends on what plastic material it is printed on.
UV Curing: This method involves exposing the printed items to specific wavelengths of ultraviolet (UV) light. The photoreactive process under UV light causes the ink to cure. UV curing is an effective method for quickly solidifying the ink and is particularly useful for certain types of ink formulations and printing applications.
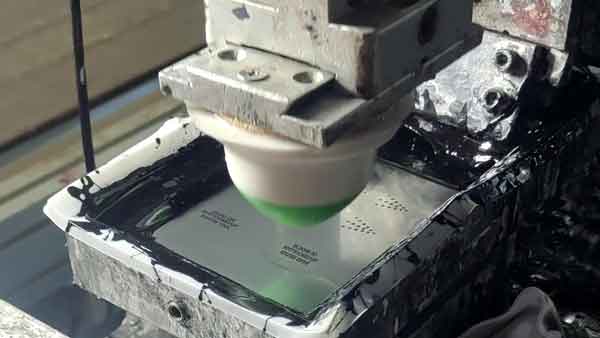
Rotary Screen Printing — Video Walkthrough
What you’ll see. This video quickly demonstrates how screen printing works: ink is pushed by a squeegee through the open areas of a stencil (screen) onto a plastic substrate, followed by drying/curing.
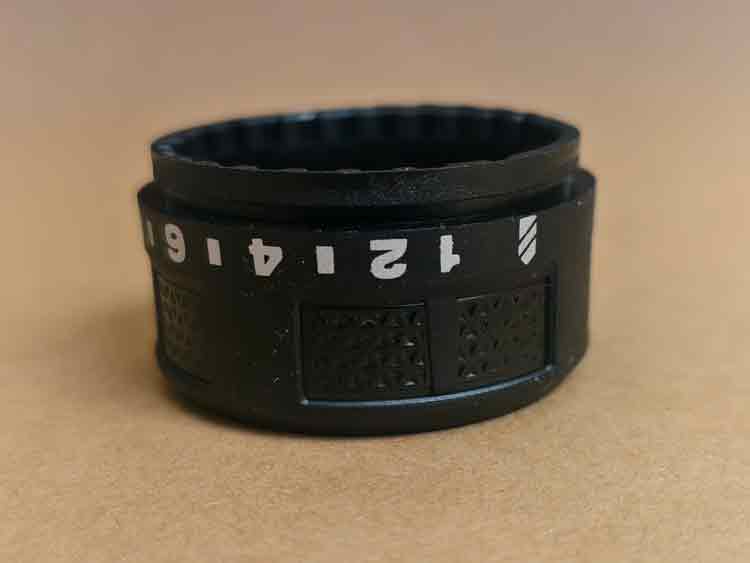
From flat to cylindrical. Screen printing is typically used on flat parts with no protrusions. With rotary screen printing, the method extends to cylindrical parts.
Synchronized motion (how it turns). The part rotates in sync with the screen. In this example a rack-and-pinion drive couples motion precisely. Some systems rely on friction between the screen and part to spin it, but we prefer positive gearing to avoid slippage and the blur it causes.
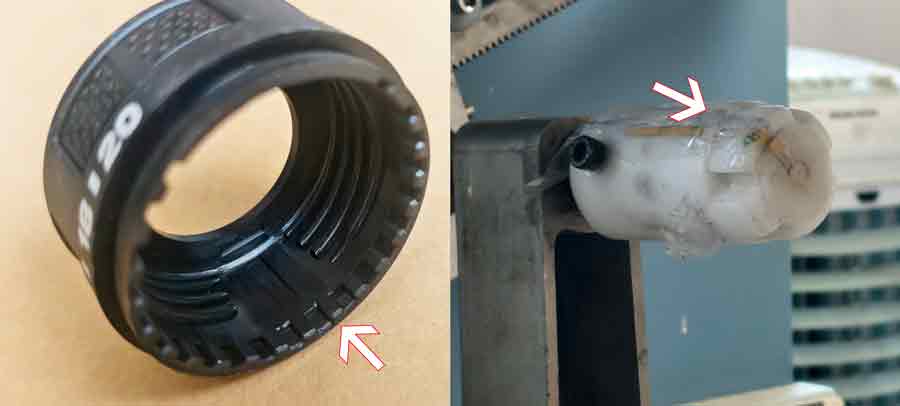
Fixturing & fit. The part engages a positioning knob/locator. Fit must be precise: too loose leads to print smear; too tight makes insertion difficult and risks damage.
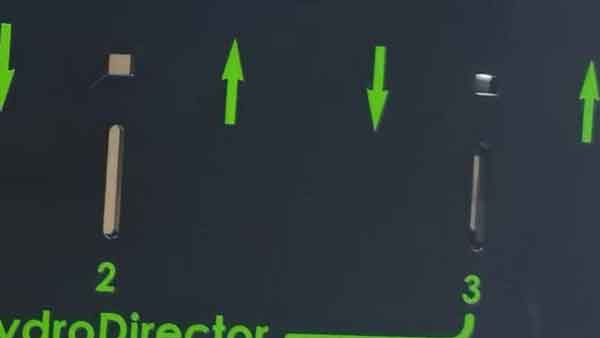
Registration & quality. The printed numbers and the internal groove align to fixed reference positions—nothing is random. Rotary screen printing demands careful attention to detail to achieve clarity, accuracy, and strong adhesion.
Pad Printing
How Pad Printing Workds
An Indirect Approach for Complex Surfaces Pad Printing is an indirect printing technique, primarily used for printing on irregular surfaces or materials that are challenging to print on. The basic steps of pad printing can be summarized as follows:
1. Plate Making and Etching: Initially, a printing plate with the desired pattern is created, typically made from metals like steel or copper. The pattern area is etched with tiny recesses.
2. Ink Filling: Then, ink is filled into the etched areas of the printing plate.
3. Excess Ink Removal: A doctor blade (or a squeegee) is used to wipe off the excess ink from the surface of the plate, leaving ink only in the etched areas.
4. Using the Pad: A soft, elastic silicone pad (the pad in pad printing) makes contact with the plate, transferring the ink from the etched areas onto the pad.
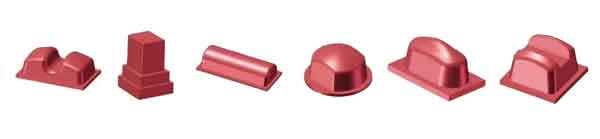
5. Transferring to the Product: The pad then moves to the item to be printed, gently pressing down to transfer the ink from the pad to the surface of the item. The softness and elasticity of the silicone pad allow it to conform to various irregular surfaces.
6. Drying and Curing: The ink dries and cures on the surface of the item, completing the printing process.
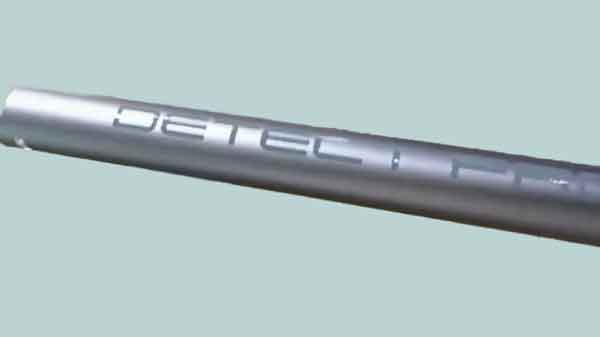
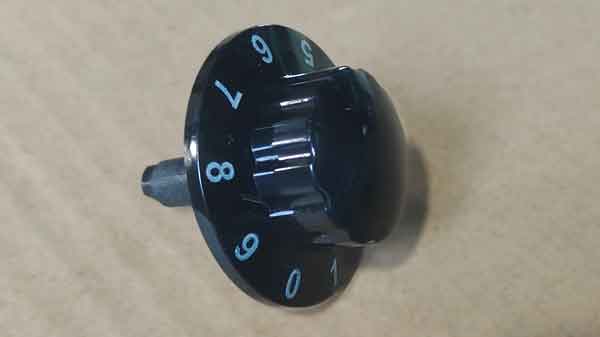
Pad Printing Examples
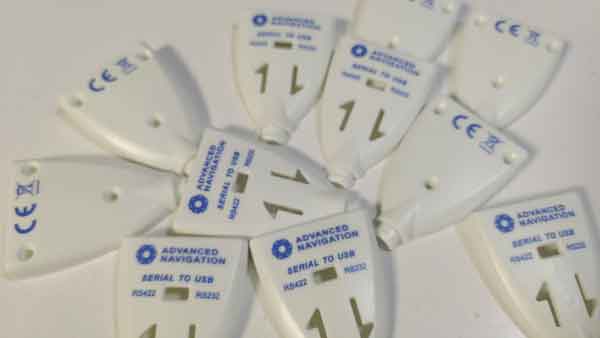
Advantages of Pad Printing
Suitable for Complex Surfaces: Pad printing is capable of printing on irregular, uneven, curved, and even rough surfaces.
Fine Detail Representation: This method can print intricate patterns and text, making it suitable for high-precision graphic printing.
Versatility in Material Compatibility: Pad printing can be applied to a variety of materials, including plastics, metals, glass, ceramics, and wood.
Adaptability in Color: Multiple colors of ink can be used, though each print cycle can apply only one color. Multicolor printing is achievable through multiple print cycles.
Efficiency and Flexibility: Pad printing is well-suited for rapid production and small batch customization, with convenient plate changing.
Disadvantages of Pad Printing
Color Limitations: Similar to screen printing, each print cycle can use only one color, making multicolor printing more time-consuming and costly.
Printing Surface Limitations: Although pad printing excels with uneven surfaces, it has limitations when dealing with extremely irregular surfaces or step-like structures. These shapes can hinder the expansion of the silicone pad, affecting its contact with the printing surface. Incomplete contact may result in distorted print patterns, thereby affecting print quality. Special attention is needed to ensure the pad uniformly contacts the entire printing area for a clear and precise print.
Pattern Size Limitations: Due to the size constraints of the silicone pad, the printing area is generally small and not suited for large-area printing.
Shallow Ink Depth in Single Prints: The ink layer applied in a single print cycle is relatively thin. This can be effectively compensated for by conducting two or three print cycles, which also brings higher production cost.
Ink Drying Time: Some types of ink require longer drying times, potentially impacting production efficiency.
Environmental Impact: Certain pad printing inks may contain volatile organic compounds (VOCs), posing potential risks to the environment and the health of operators.
Ink Requirements for Screen & Pad Printing
Screen and pad printing require specific ink properties to ensure optimal performance and durability on plastic surfaces. Below are some key ink requirements.
Ink Adhesion to Substrate
The adhesion between ink and plastic is a fundamental requirement for both screen and pad printing. Adhesion is most commonly evaluated with the cross-hatch adhesion test—often referred to as the grid test—while a quicker, informal method is to scrape the print with a fingernail or plastic spatula to see if it peels.
Plastics can be classified into two categories based on ink adhesion:
Good Adhesion: Plastics with higher molecular polarity—such as ABS (often the easiest and a preferred choice for plastic printing), PA, PC, and PVC—have relatively high surface energy, so inks adhere well without pretreatment. For these materials, choosing a compatible ink is usually sufficient.
Poor Adhesion: Low-polarity plastics such as PE, PP, PET, and POM (the hardest to print) generally require pretreatment to achieve adequate ink adhesion. Common methods include plasma or corona treatment, flame treatment, or applying a primer/adhesion promoter.
In some cases, plastic materials that contain plasticizers or other additives may cause ink adhesion to weaken over time as these chemicals migrate to the surface. To prevent this, it’s recommended to use virgin materials and avoid plastics with unknown additives.
Alcohol Resistance
Some plastic products, particularly in medical devices, electronics, and automotive interiors, may come into contact with alcohol during use. In these cases, it’s important to choose inks that are resistant to alcohol.
To test alcohol resistance, an alcohol-soaked cotton ball is rubbed on the printed surface 50-100 times. If the ink starts to peel off, the ink is not alcohol-resistant. In environments requiring alcohol resistance, be sure to select inks that are designed to withstand alcohol exposure. This depends on the ink formulation, additives, and curing process.
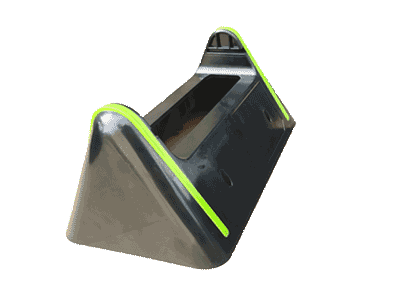
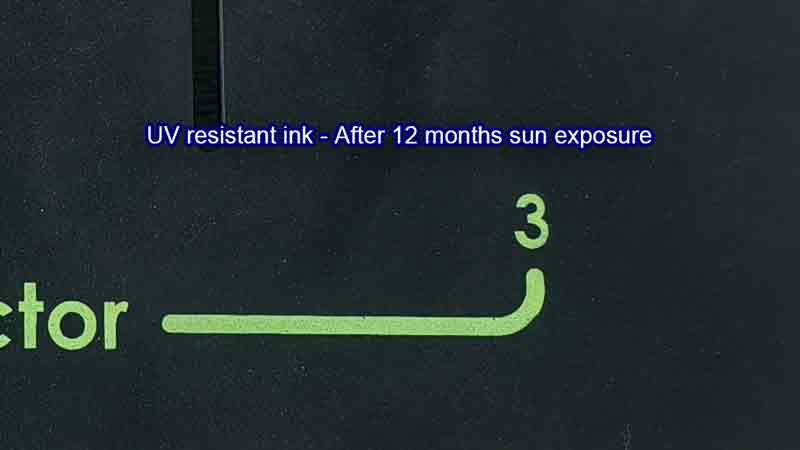
UV Resistance (Sunlight Exposure)
While standard inks are suitable for indoor use, products intended for outdoor use must have inks that can resist ultraviolet (UV) light to prevent degradation from prolonged sun exposure.
Under UV exposure, inks can fade, discolor, and eventually powder or peel off.
Therefore, UV-resistant inks are necessary for outdoor products. For example, a product printed with standard ink showed significant color change from green to blue after just six months of sunlight exposure.

However, when using UV-resistant ink, the color remained stable even after 12 months, with only minor wear in certain areas.
Laser Etching
Laser etching is also known as laser engraving or laser marking. It involves using high-energy laser beams to etch marks onto the surface. This method can create lasting and precise markings, such as text, patterns, and barcodes, on various types of plastic surfaces. The laser marking process typically involves the following steps:
How Laser Etching Works
Designing the Artwork: The first step is designing the content to be marked, which may include text, graphics, barcodes, etc. These designs are usually created using specialized software on a computer.
Setting Laser Parameters: Depending on the desired marking effect and the type of plastic, the parameters of the laser, such as power, speed, focus, and frequency, are set accordingly.
Executing Laser Marking: The plastic product is placed on the worktable of the laser marking machine. The laser emits a high-energy beam that moves along a predetermined path, focusing on the surface of the plastic.
Material Response: When the laser contacts the plastic surface, several different physical or chemical reactions can occur, depending on the nature of the plastic and the laser settings:
- Material Removal: The laser ablates a layer of the surface, creating a recessed mark.
- Color Change: The heat from the laser causes a color change in the plastic, forming a distinct contrast in the marking.
- Chemical Change: The laser induces a chemical reaction that alters the color or texture of the material’s surface.
Cooling and Processing: After the marking process is completed, cooling and additional processing may sometimes be necessary to ensure the quality of the marking.
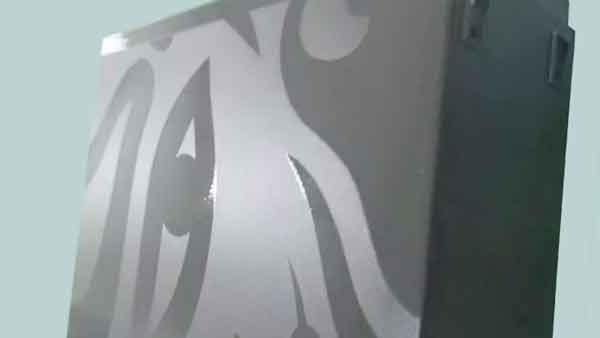
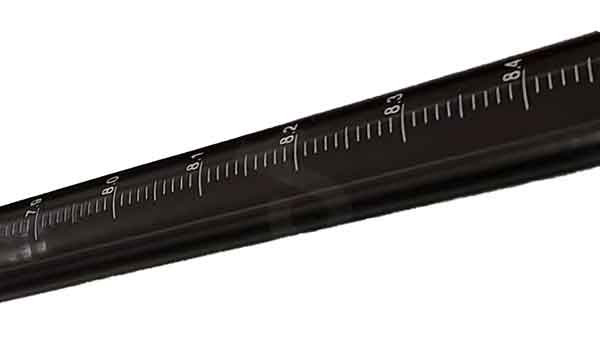
Laser Printing Examples
Advantages of Laser Marking
Precision and Detail: Laser marking can create extremely fine and complex patterns.
Non-Contact Process: The marking process involves no physical contact, reducing wear or deformation on the product.
Speed and Automation: Marking is fast and can be easily integrated into automated production lines.
Durability: The markings are long-lasting and resistant to fading or wear.
However, the effectiveness of laser marking can vary based on the type of plastic and its color. Different materials react differently to the laser, necessitating adjustments in laser parameters for specific materials.
Disadvantages of Laser Marking
Color Limitations: The colors achievable with laser marking largely depend on the material and its reaction to the laser. Commonly, markings are in a light gray color to contrast against the background. Due to technical limitations, other color choices are restricted.
Limitations on Uneven Surfaces: Due to focal distance constraints, laser marking might struggle to achieve uniform and clear prints on uneven or textured surfaces.
Durability Concerns: Although generally considered permanent, laser markings can fade or wear under certain conditions, such as prolonged exposure to intense light or harsh chemicals.
Conclusion
The printing on plastic products is not limited to just screen printing, pad printing, and laser engraving; there are also other methods like water transfer printing, in-mold decoration, hot stamping (foil stamping) and inkjet printing. Although these techniques might not be as widely used as the first three, or they might require higher production volumes, each has its unique features.
When selecting the appropriate printing technology, various factors such as material type, surface characteristics, design requirements, and production scale should be considered to meet both aesthetic and practical needs of the product.