Table of Contents
ToggleThe 3D drawings only give geometrical information but leave key requirements unspecified
Very often, we only have the 3d drawings to work from (for the plastic injection molds and the parts produced by these molds). However, this is like a shot in the dark, there are many important specifications that may be missing:
- Key dimensions and their tolerances. We need to choose just the appropriate tolerances for that specific application. It the tolerance is too loose it may result in under-performance, while a too tight tolerance will lead to unnecessary cost increase.
- The aesthetic requirements: type of surface finishes, which area need to be nice looking (and to what level), which area are hidden in the assembly then they are less demanding.
Usually these kind of requirements are specified on the 2D CAD drawings, but many times, our customers do not provide them, either they want to save time, or some customers just are not capable of doing so.
More information of the assembly will help us to define product quality requirements
Defining all quality requirements is a demanding and time consuming job, so, is there an easier approach?
There certainly is one, that is you provide us full details of the product (assembly), including:
- What the parts are used for (their application), so we understand what level of aesthetic requirements it should be, what type of surface finish it should be, what loads the parts are subjected to, and so forth.
- How the parts are assembled together, so we will figure out what dimensional and geometric tolerances (like flatness, roundness) are required.
An easy to understand example
Let me give an example here.
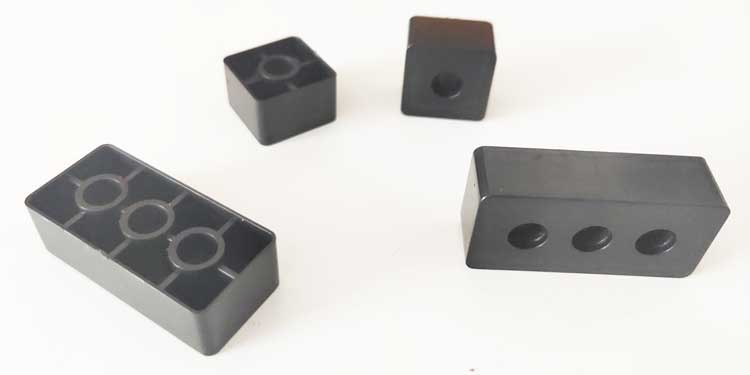
These 2 parts are somewhat like Lego bricks, they are quite simple in geometry, which make them a great example for this topic.
At first when we asked the customer, they said the general tolerance of +/-0.10mm (+/-0.004 inch) will be just fine for its application, but we were suspicious that some key dimensions missed their tolerances, because these parts look like Lego bricks and should function in a similar way.
What are the matching components and how they fit together
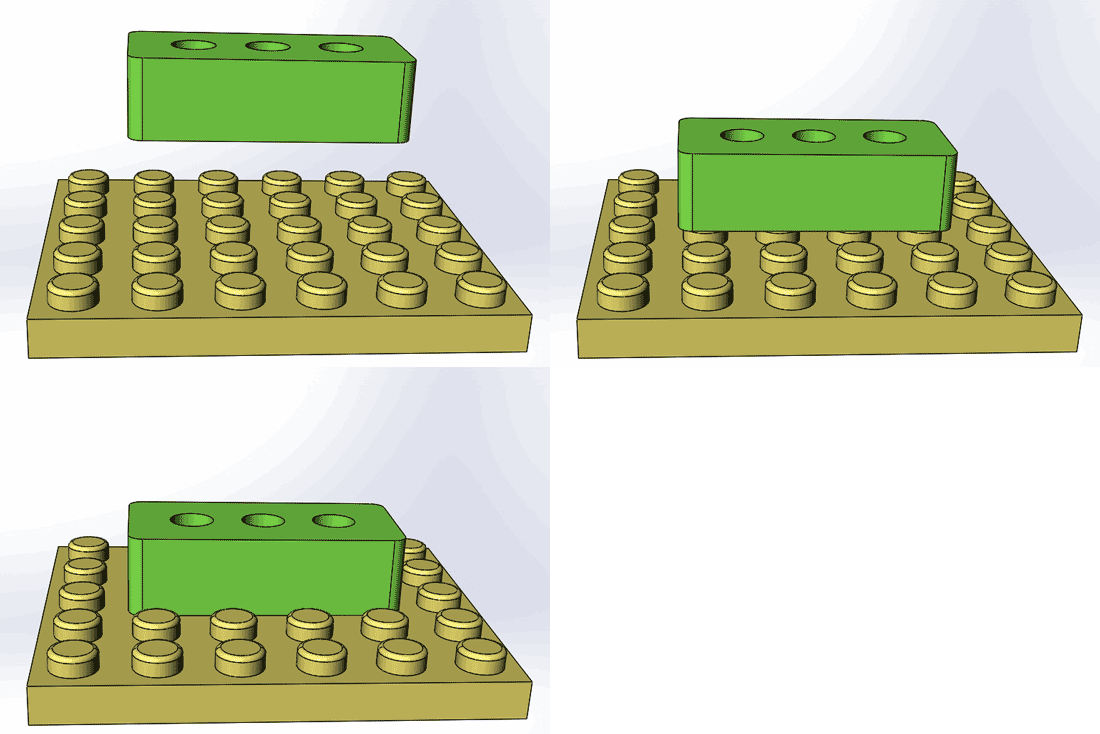
Just before we were about to start on the molds, we requested again for more information of the full assembly. The customer sent us the drawing of the matching components, they proved our guess is correct, they do resemble Lego bricks, the parts will be inserted into the array of round extrusions on a board (a pegboard):
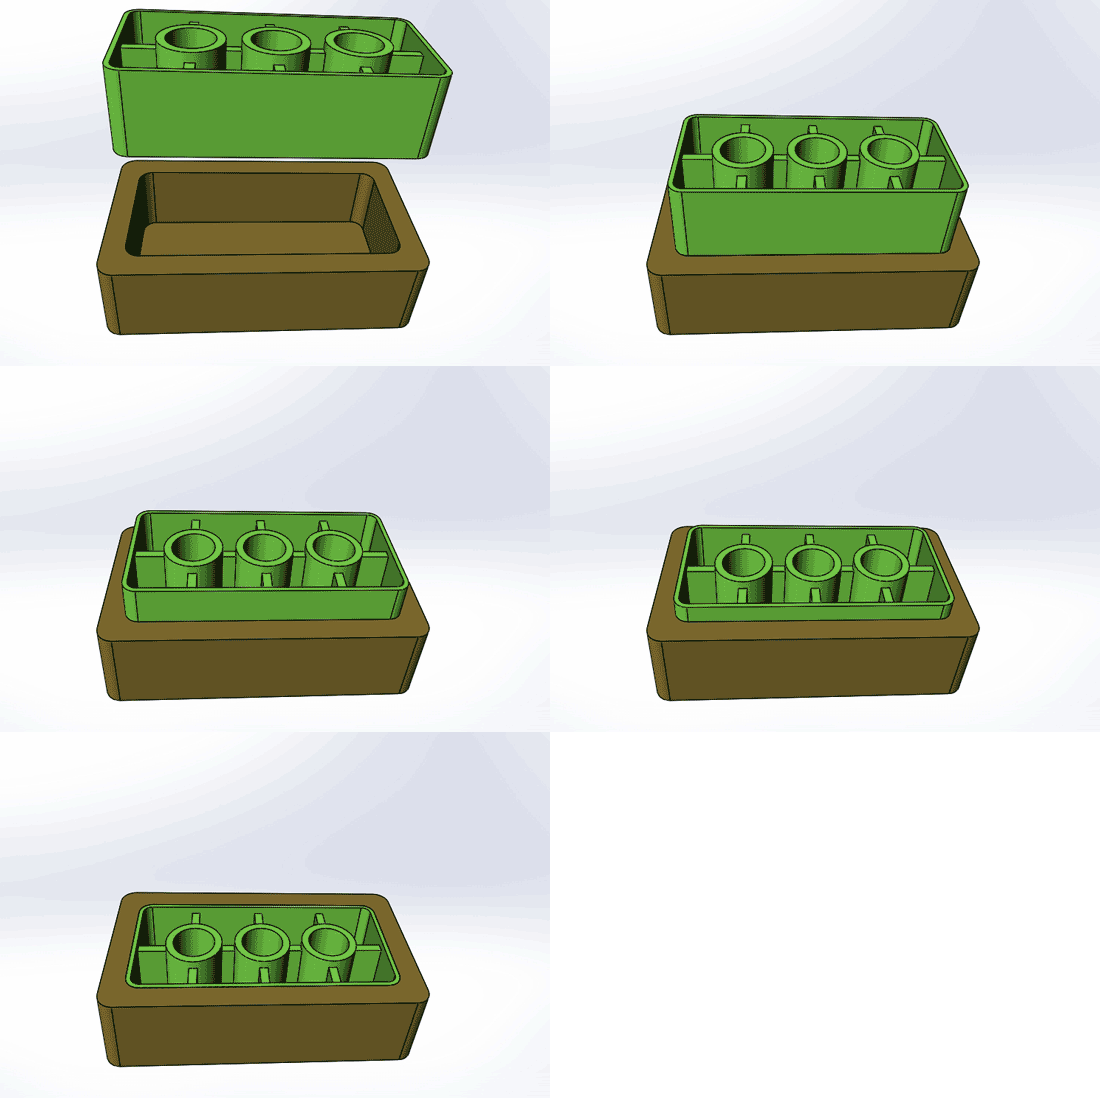
And they also need to be pressed into a cavity by hands with appropriate pressing forces, not too loose, not too tight as well.
You can send us the samples of the matching components, or send us the precise measurements of key dimensions
You can send us the samples, so we can take the measurements of the key dimensions. It is always advised to send multiple samples (like 2 or 3 pieces), because the measurements can not be exactly the same between different samples. There is always an allowance for dimensions in manufacturing.
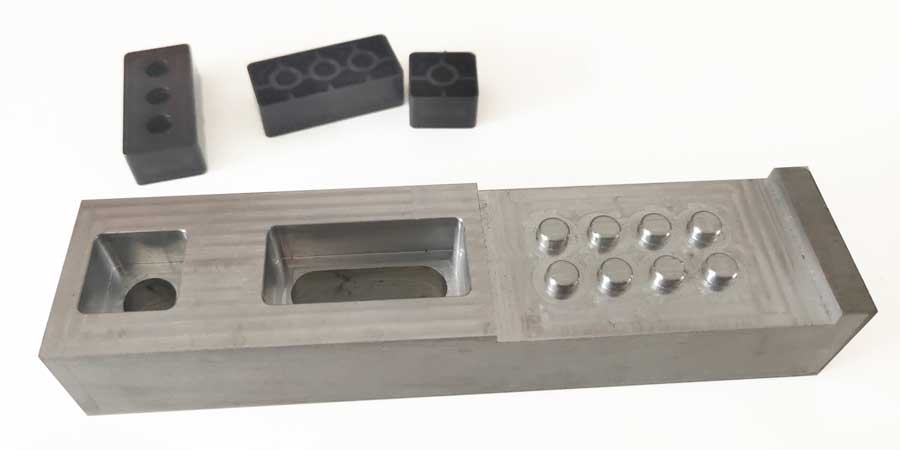
If you want to save the time and money, you can just send us the drawing, or the pictures of the samples, and take precise measurements by yourself. With the dimensions you send, we can make inspection gauges just as the same way as the matching components, just like this one:
We chose the tolerance for key dimension to be +/-0.02 mm
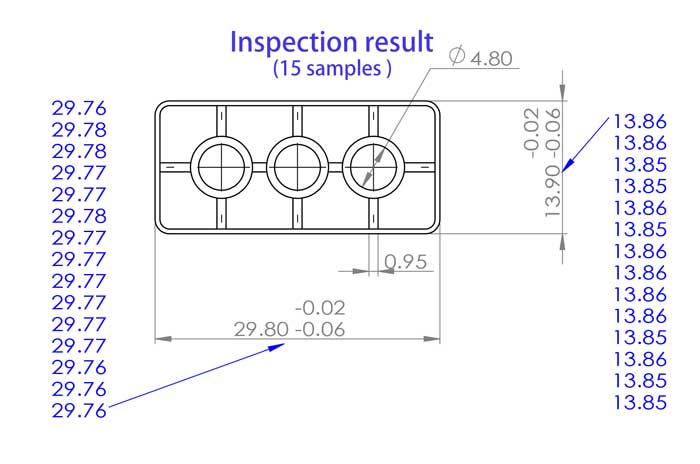
Now we know a much tighter tolerance is needed. Since shrinkage always comes with the injection molding process, it leads to a poorer uniformity in geometry, we will usually choose a looser fit compared to CNC machined metal parts. We made it 29.80 -0.02/-0.06mm (or 29.86 +/-0.02mm). To further prove this is the appropriate tolerance, we made a inspection gauge, with the key dimensions made exactly the same as the real matching components.
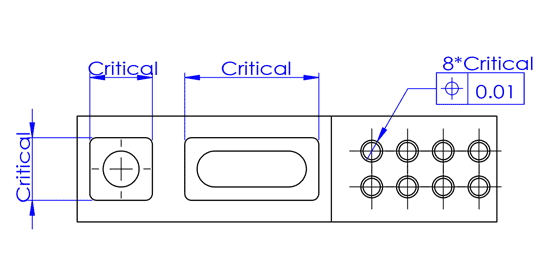
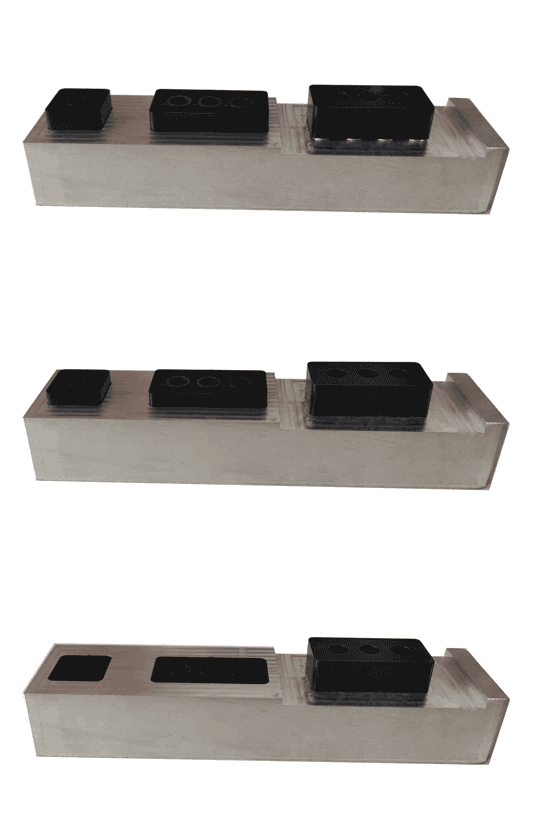
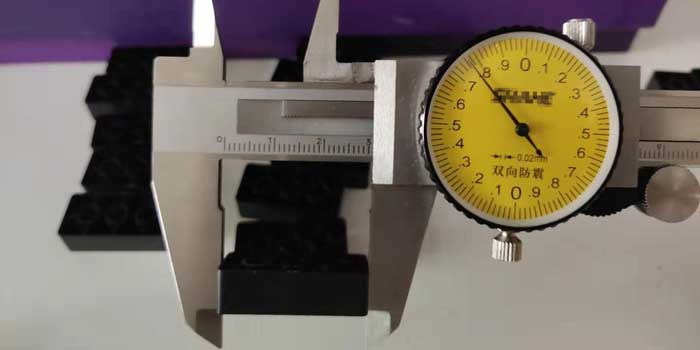
We check the key dimensions with both a caliper and the inspection gauge
When we are injection molding the parts, we first check them with the inspection gauge, see if they can be pressed into the cavities by hands, and be taken out with the right amount of tightness.
We then checked the key dimensions with 15 samples. They are picked out from the 300 or so pieces we produced (that is 1 in every 20 pieces produced). The measurements showed good consistency and they all fall in the tolerances.
