Table of Contents
ToggleWhat Are Injection Molding Surface Finishes
Injection molding surface finishes refers to specific grade of roughnesses, textures or patterns created on the surface of a mold, encompassing not only surface roughness but also various design patterns.
Surface roughness and texture are usually defined by recognized industry standards such as SPI, VDI 3400, and MT, We will explain these standards in more detail below to help guide finish selection.
Compared with standard surface roughness, design patterns offer a wider range of visual effects. These patterns can replicate natural materials such as wood grain or leather, or create abstract geometric designs. They are widely used in industries such as automotive, electronics, and consumer products.
By selecting the right mold surface finish, manufacturers can improve product appearance, enhance usability, and hide minor surface defects caused during production.
The Role of Injection Molding Surface Finishes
In general, injection molding surface finishes serve several important functions:
- Improve product appearance and enhance design appeal;
- Increase grip and create a better tactile feel;
- Improve coating, painting, or plating adhesion;
- Help conceal surface imperfections from the manufacturing process;
- Enhance clarity and optical performance for transparent parts。
In these ways, mold surface texture technology becomes an integral part of product design, enhancing functionality, aesthetics, and performance, thereby boosting the market competitiveness of the final product.
Processing Methods for surface finishing in injection molds
Mold surface finishes can be created using a variety of processing methods, each with its unique characteristics and suitable applications. Here are some common processing methods:
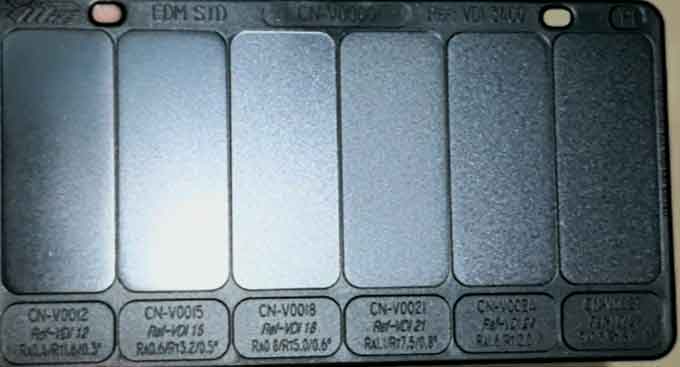
EDM (Electrical Discharge Machining) - Sand-like Texture
Electrical Discharge Machining (EDM) uses high temperatures generated by electrical sparks to melt and evaporate material. This process naturally forms a sand-like texture on the mold surface, commonly referred to as EDM finish/texture or spark erosion texture.
Surface Texture and Control
The appearance of EDM surfaces can be compared to the VDI 3400 standard (which will be introduced further below). By adjusting discharge parameters, such as increasing current and pulse width, different surface roughness levels can be achieved.
EDM vs. Sandblasting
EDM-created textures are similar to sandblasting but offer several advantages, such as better uniformity and longer-lasting results. This makes EDM an ideal choice for more consistent and durable surface finishes.
Importance of Specifying EDM Surface Texture
If a sand-like texture is required, it’s essential to specify the desired EDM texture before mold production. Doing so ensures that the texture is incorporated directly during manufacturing, saving time and reducing costs. Additionally, EDM surface textures are more durable, maintaining their appearance over time.
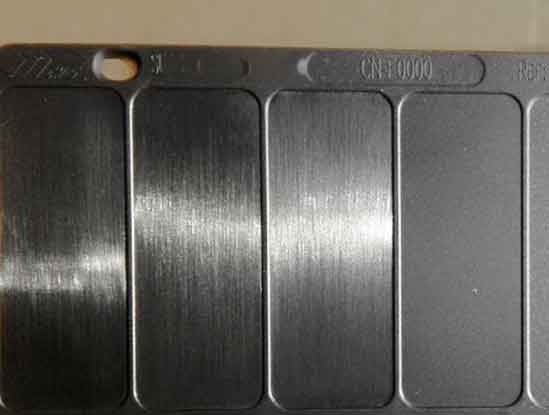
Manual Polishing – Smooth / Mirror-like/ Brushed Finish
Manual polishing involves using abrasive materials and tools to manually smooth the mold surface. This process is particularly effective for removing machining marks, light scratches, and achieving a desired level of smoothness.
High Gloss and Brushed Finish Options
This method is especially suitable for molds requiring high gloss levels, such as those needing highly reflective surfaces. The surface appearance can be referenced against SPI A1 to A3 standards for high gloss finishes.
Manual polishing can also achieve a brushed finish, which corresponds to SPI B and C standards.
Initial Steps and Mirror-like Finish
The initial step typically involves using a whetstone to remove machining marks. This is followed by progressively finer grades of sandpaper to improve the surface smoothness.
To achieve a mirror-like finish, wool wheels combined with diamond paste are used. Polishing is a meticulous process that requires significant patience and precision, often carried out in dust-free workshops.
Role in Further Surface Treatments
Manual polishing also serves as a foundational step for additional mold surface treatments, such as sandblasting, chemical and laser etching.
For certain high-precision plastic products, T0 samples require polished surfaces for thorough inspection of surface quality. Only after this initial polishing step are additional surface textures applied, emphasizing the crucial role of polishing in mold processing.
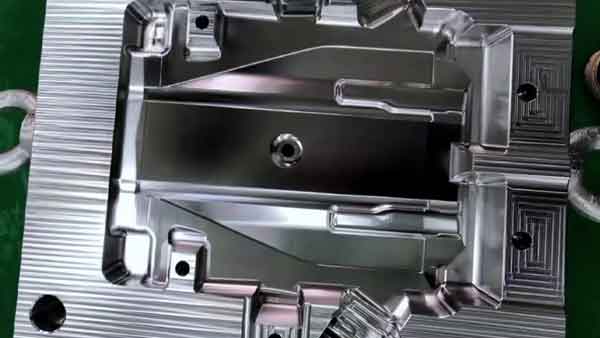
CNC Electrode + EDM – Large and Deep Patterns
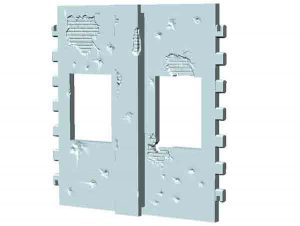
In mold making, the patterns on the mold cavity are the inverse of the plastic part. For example, raised features on the plastic correspond to recessed features in the mold. This method first involves machining an electrode (usually copper or graphite) with a pattern that matches the plastic part. The electrode is then used in EDM to transfer the inverse pattern onto the mold.
Achieving Small Radii and Sharp Features
This approach allows the creation of raised features with very small radii or sharp points. Because milling cutters are round, directly machining recessed features to a sharp angle is not possible, making this combined CNC + EDM method essential for certain geometries.
Advantages and Applications
CNC electrode + EDM is a traditional and straightforward technique. It is especially suitable for producing large or deep textures, such as decorative patterns or logos. The method reliably handles features that require depth and size beyond the capability of direct milling.
Limitations and Surface Quality
However, this method is not effective for very fine or intricate patterns. Complex patterns require long CNC machining times, and the mold surface often retains machining marks that need post-polishing. As a result, the surface may feel slightly rough and cannot achieve extremely fine or highly textured finishes.
Sandblasting - Sand-like Texture
Sandblasting involves propelling sand particles at high speed to impact and roughen the mold surface. This straightforward and rapid method is especially suited for treating large areas on a mold.
Materials and Coarseness
For sandblasting, materials such as silicon carbide and glass beads are commonly used. Their coarseness is measured in mesh sizes, typically ranging from around 10 to several hundred, with 80 to 200 mesh being the most frequently chosen.
Surface Texture and Uniformity
Although sandblasting can be applied to various surfaces of the mold, the bottom and sides tend to produce different sand texture effects, resulting in an uneven surface finish. Additionally, if sandblasting is done for too long, the surface may become shiny.
Longevity of Sandblasted Surfaces
Surfaces treated with sandblasting tend to smooth out and lose their texture over time. Compared to textures created by other methods, sandblasted surfaces have a shorter lifespan and require regular reprocessing to maintain their desired effect.
Chemical Etching – Sand Texture, Leather Texture, Geometric Patterns
Process Overview
The process begins with polishing the mold surface to a smooth finish (Ra ≤ 0.4 µm). After cleaning the surface to remove any oil, a layer of photoresist is applied.
Next, a film is placed over the mold, and UV light is used for exposure. The exposed areas of the photoresist harden, while the unexposed areas can be dissolved and washed away.
Once the unwanted photoresist is removed, an acidic solution is applied to etch the surface. This process creates the desired patterns, such as textures or geometric designs.
Durability and Comparison
Chemical etching provides a relatively long lifespan for the created texture, similar to EDM-produced textures. It is significantly more durable than sandblasting textures.
Process Complexity and Cost
However, the chemical etching process is more complex and slightly more costly than other methods. It is also possible to rework the etched surface, but each reworking results in some loss of dimensional accuracy.
Precision Limitations
While chemical etching offers good durability, it lacks the precision of electroforming and laser engraving. This makes it unsuitable for creating fine details such as pores or stitching on the surface.
Electroplating – Bright Mold Surface
Electroplating involves depositing a thin metal layer onto the surface of a mold. This process enhances wear resistance, provides corrosion protection, and adds a decorative, glossy finish.
Common Electroplating Types
The most commonly used electroplating methods for molds include nickel plating, chrome plating, and titanium plating (PVD vacuum coating). These techniques allow the mold surface to achieve ultra-smooth, mirror-like finishes with very high brightness.
Advantages of Electroplating
Electroplating not only improves surface hardness and wear resistance, but also reduces the adhesion of plastic products, minimizing sticking during injection molding. This makes the mold easier to release and extends its service life.
Limitations and Considerations
Despite its benefits, electroplated layers are brittle and can peel off under significant impact. The coatings are thin, and while wear-resistant, they are difficult to repair; even minor repairs may be ineffective. Additionally, thickening the plating on fine corners or sharp details can obscure or distort the original geometry. These limitations should be carefully considered before electroplating a mold.
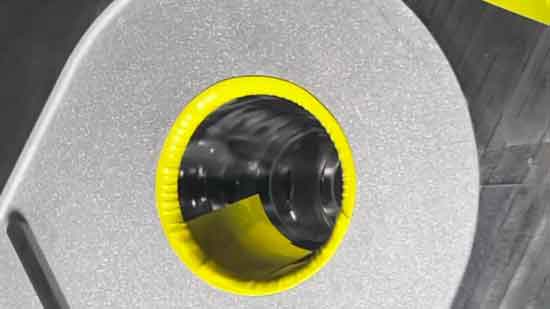
Electroforming – Various Textures and Fine Geometric Shapes
Electroforming is a technique that uses electrochemical deposition to create precise geometric shapes for molds.
Unlike other mold processes that typically remove material, electroforming, like electroplating, actually builds up metal. This technique is ideal for creating complex shapes with micron-level precision and high surface smoothness, making it suitable for miniature components and optical devices.
Process Overview
The process begins by creating an extremely fine pattern on a master mold, which can be made from metal, resin, wax, or other materials.
The master mold is then placed in an electroplating bath, where an electrical current is applied. Nickel or copper atoms gradually deposit onto the surface layer by layer.
Once the desired thickness is reached, the master mold is removed, leaving behind a reverse pattern in metal. The metal shell is then cut into the required shape and embedded into the mold for injection molding.
Advantages and Precision
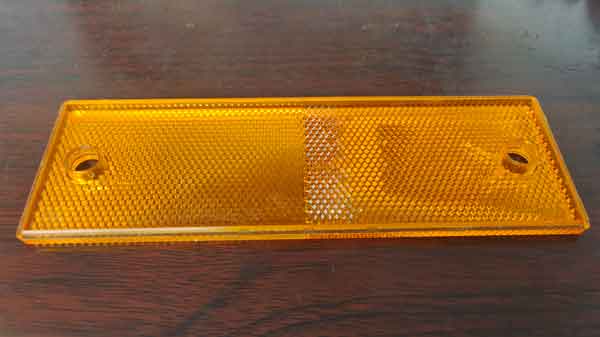
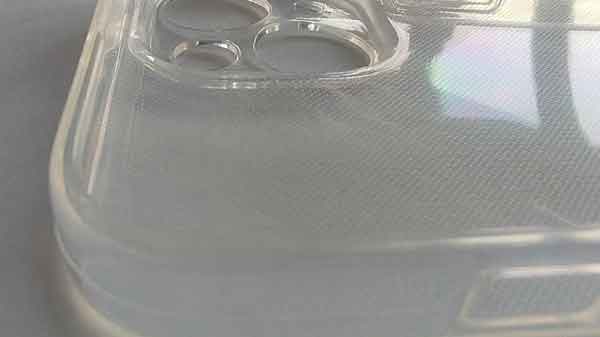
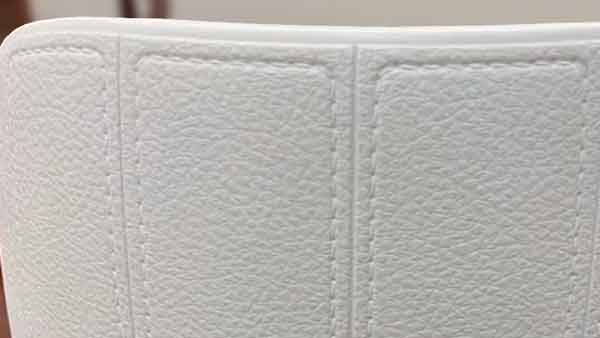
Electroforming offers the advantage of perfectly replicating the master mold’s shape in a 1:1 ratio, allowing for the creation of surfaces with exceptional detail. This includes fine details such as leather pores, small patterns, and high-precision features like Fresnel lenses.
It also allows for the creation of deep textures, such as those found on reflective mirrors for electric vehicles.

Limitations: Slow Deposition Rate and Fragility Under Pressure
However, the metal deposition rate during electroforming is quite slow, typically only 0.02–0.04 mm per hour. To achieve a thickness of 2–3 mm, it can take several days. This slow process makes electroforming relatively expensive.
Additionally, the resulting electroformed shell is typically used as an insert in molds. Due to thickness limitations, it cannot withstand excessive pressure during injection molding, as it may crack under such stress.
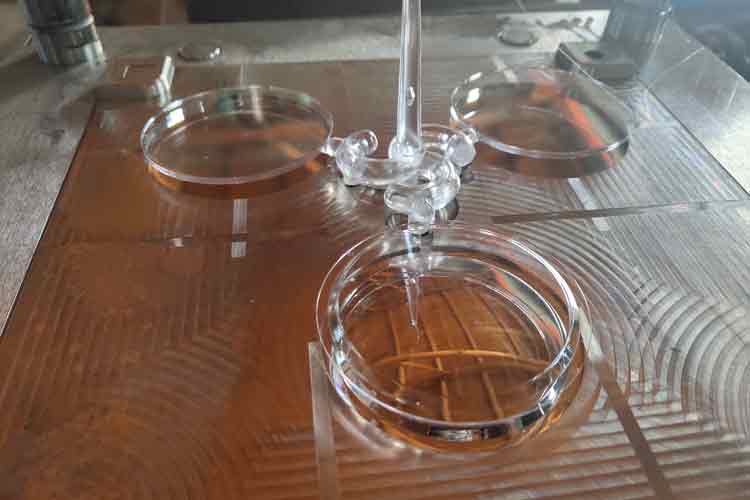
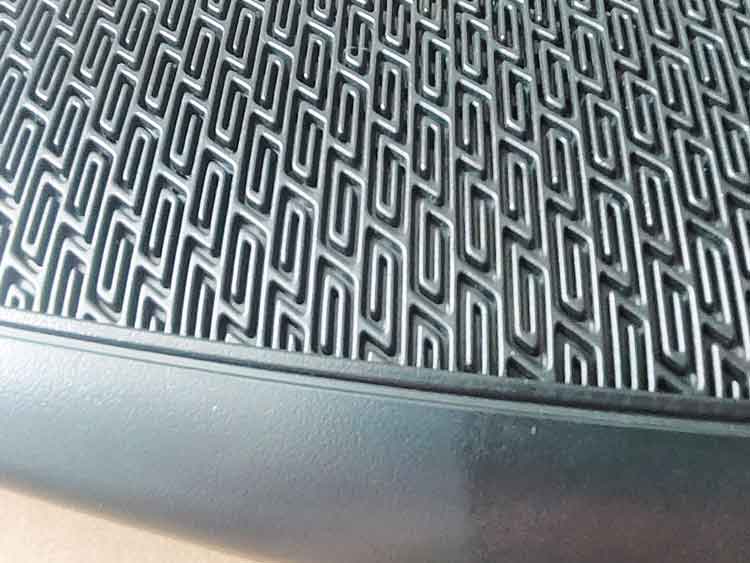
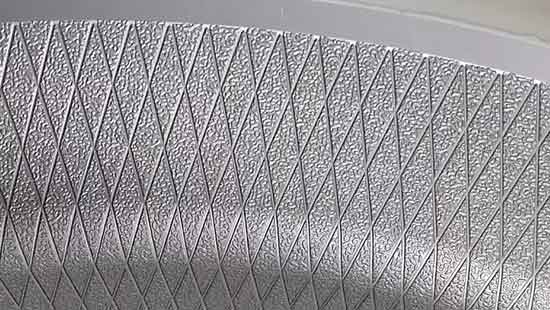
5-Axis Laser Engraving – High-Precision Patterning on Mold Surfaces
5-axis laser engraving uses high-precision laser equipment to etch intricate and detailed patterns directly onto mold surfaces. This technology is capable of three-dimensional processing, making it ideal for high-end, delicate, and complex mold fabrication.
Precision 3D Surface Engraving
By controlling the X, Y, and Z axes of the laser head simultaneously, the system can precisely engrave large areas and complex 3D curved surfaces. This allows for consistent pattern depth and accuracy across the mold.
Advantages Over Other Methods
Since the laser directly engraves the metal surface, chemical etching or electroformed inserts are not required. This avoids the fragility issues of electroformed inserts and improves heat dissipation. 5-axis laser engraving is commonly used for automotive interior components, such as dashboards and door panels, as well as for household appliances and digital device housings.
2 Examples of 5-axis surface texturing
Cost and Operational Considerations
5-axis laser machines are expensive, and both pattern design and machine operation require skilled technicians. Incorrect process parameters can result in uneven surfaces or visible join marks. This makes 5-axis laser engraving more expensive than many other processes.
Depth Limitations and Surface Requirements
This method is not suitable for very deep textures. Typical engraving depths range from 0.02–0.15 mm, while exceeding 0.2 mm significantly reduces efficiency and increases the risk of defects such as remelting, blackening, or rough surfaces. The mold surface must also be polished to a high degree of smoothness before engraving to achieve the best results.
In theory, in conjunction with 3D pattern design, 5-axis laser engraving can create any desired texture shape with precise dimensional control, surpassing other methods in this regard. However, due to the high cost of the equipment, the processing fees are also significant, which limits its widespread adoption.
The table below provides a quick comparison of 8 different processing methods.
| Process | EDM | Manual Polishing | CNC Electrode + EDM | Sand-blasting | Chemical-Etching | Electro-plating | Electro-forming | 5-Axis Laser Engraving |
|---|---|---|---|---|---|---|---|---|
| Price | Moderate | Low to high | Medium | Low | Midium | High | Very High | Very High |
| Popularity | High | High | High | Moderate | High | Low | Low | Low |
Current Common Injection Mold Surface Finishes Standards and Norms
In plastic manufacturing and mold design, mold surface finishes standards are vital. The three most accepted and utilized standards are SPI (Society of Plastics Industry), VDI 3400 (Standing for Verein Deutscher Ingenieure, meaning the German Engineering Association in English), and MT (Mold-Tech).
While many factories have their proprietary texture plates, these three are globally recognized. SPI is prevalent in the U.S., VDI 3400 in Europe, and MT’s versatility and flexibility make it widely adopted worldwide.
The SPI Standard
The SPI (Society of Plastics Industry) standard, established by the American plastics industry, guides the surface treatment of plastic injection molds. It categorizes mold surface textures into four main classes—A, B, C, D—each further divided into three levels, making a total of 12 types of surface treatments.
- Class A (A-1, A-2, A-3) denotes polished surfaces for high gloss, suitable for products requiring smooth, mirror-like appearances.
- Class B (B-1, B-2, B-3) involves brushed surfaces for medium gloss and fine textures, ideal for visually appealing products not needing high gloss.
- Class C (C-1, C-2, C-3) is also brushed but coarser than Class B, used for products needing medium roughness, often to enhance grip or conceal manufacturing flaws.
- Class D (D-1, D-2, D-3), the roughest, typically involves sand-textured surfaces, for products requiring enhanced tactile feel or specific visual effects.
Overall, SPI standards focus more on the degree of polish rather than pattern styles, playing a crucial role in manufacturing by aiding manufacturers in selecting suitable surface treatments based on product requirements.
Overview of SPI standard for polishing
| SPI (new) | Description | Ra in µm (DIN) | Comments |
|---|---|---|---|
| A-1 | Diamond buff grade 3 | 0 – 0.025 | For mirror or optical finishes. Most time-consuming. Steel grade important to results. |
| A-2 | Diamond buff grade 6 | 0.025 – 0.05 | |
| A-3 | Diamond buff grade 15 | 0.05 – 0.076 | |
| B-1 | 600 grit paper | 0.05 – 0.076 | Removes all tool and machining marks. Provides good mold release. Light reflecting finish on molded part, some sheen. |
| B-2 | 400 grit paper | 0.10 – 0.127 | |
| B-3 | 320 grit paper | 0.23 – 0.25 | |
| C-1 | 600 stone | 0.25 – 0.30 | Removes all tool and machining marks. Provides good mold release. Mute finish on molded part, no sheen. |
| C-2 | 400 stone | 0.64 – 0.71 | |
| C-3 | 320 stone | 0.97 – 1.07 | |
| D-1 | Dry blast glass bead 11, 200 distance at 0.7 Mpa; 5 sec | 0.25 – 0.30 | For decorative finishes. Often used for diecast and thermoset cooling. Helps hide shrink marks and other imperfections. Dull, non reflecting finish on molded or cast part. |
| D-2 | Dry blast 240 oxide, 125 distance at 0.7 Mpa; 5 sec | 0.66 – 0.81 | |
| D-3 | Dry blast 240 oxide, 150 distance at 0.7 Mpa; 5 sec | 4.83 – 5.84 |
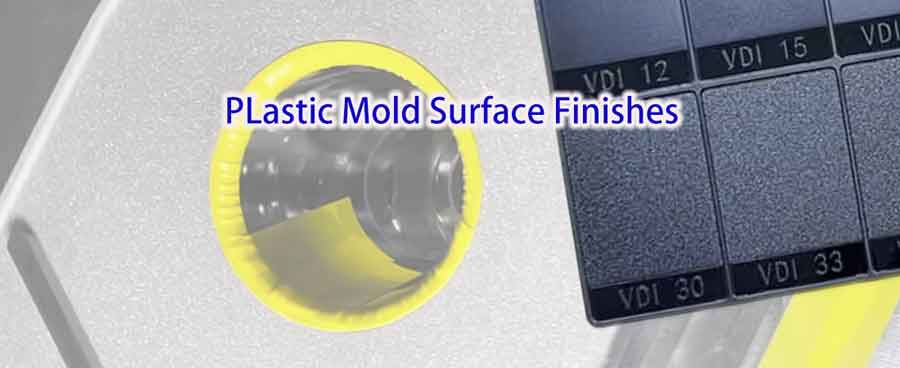
The VDI 3400 Standard
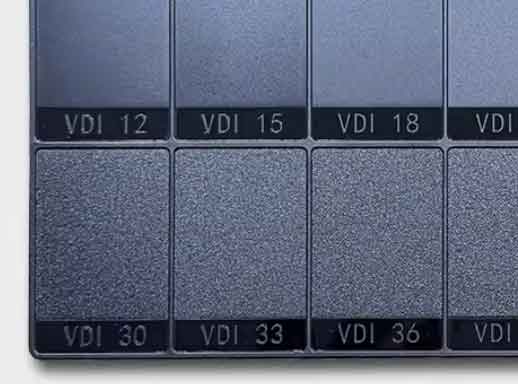
The VDI 3400 standard, established by the German Engineering Association (Verein Deutscher Ingenieure), defines the texture processing of mold surfaces. It encompasses 46 different texture grades, ranging from VDI 3400 #0 (very fine) to #45 (very coarse).
In practice, the most commonly used grades are VDI 12, 15, 18, 21, 24, 27, 30, 33, 36, 39, 42, and 45. These 12 grades are widely used in the plastics industry, and corresponding plastic texture samples are generally easier to obtain.
It is important to note that VDI grades do not include mirror-polish finishes. All VDI grades are matte textures. Even VDI 0 has a roughness of Ra 0.10 μm, which is still not considered a true mirror finish. Mirror finishes are usually specified under the SPI A standard, with SPI A1 typically below Ra 0.025 μm.
VDI 3400 textures are mainly associated with electrical discharge machining (EDM), which is well suited for producing fine and consistent surface textures. Although VDI surfaces often appear similar to sand-textured finishes, VDI 3400 is not essentially a standard for “sand texture finishes”. It is better understood as a roughness grading system.
However, for larger surfaces, to avoid uneven or excessively rough textures, supplementary techniques like polishing chemical etching and sandblasting are employed. This combination of methods makes VDI 3400 a practical and versatile standard for a wide range of mold design requirements and applications.
The table below shows the relationship between common SPI grades and the corresponding surface roughness (in Ra value).
| Grade | 0 | 3 | 6 | 9 | 12 | 15 | 18 | 21 | 24 | 27 | 30 | 33 | 36 | 39 | 42 | 45 |
|---|---|---|---|---|---|---|---|---|---|---|---|---|---|---|---|---|
| Ra (µm) | 0.10 | 0.15 | 0.20 | 0.30 | 0.40 | 0.55 | 0.80 | 1.10 | 1.60 | 2.20 | 3.20 | 4.50 | 6.30 | 9.00 | 12.50 | 18.00 |
The MT Standard
Differing from the previously mentioned standards, the MT (Mold-Tech) standard is developed and promoted by a company, rather than an industry association.
MT is often described as having a global library of more than 500,000 textures. These textures can be broadly grouped into several categories, including geometric, linear, organic or natural, leather-like, and decorative or functional textures.
Among them, more than 500 textures are publicly searchable online. Access to this online catalogue is free, but users must first register on the company’s website in order to view it. If a suitable texture cannot be found in the public catalogue, customers usually need to work directly with Mold-Tech’s engineering team to explore the wider global library. The company can also develop custom textures for special design requirements.
It is also worth noting that many other mold surface texturing companies offer similar pattern libraries. Their selections are often much smaller than Mold-Tech’s, but their prices may also be more competitive. In the end, the best choice depends on your product requirements, visual goals, and budget.
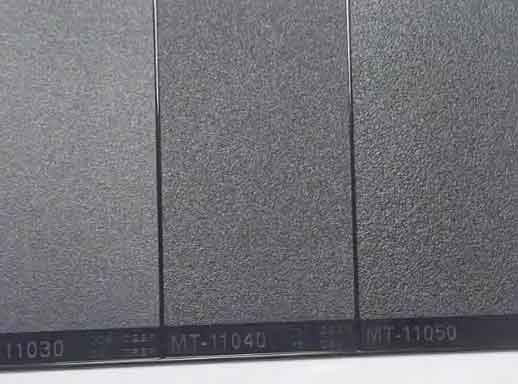
Most Common MT Grades
| Grade | Depth(in.) | Minimum Draft Angle |
|---|---|---|
| MT 11000 | 0.0004 | 1.0° |
| MT 11010 | 0.0010 | 1.5° |
| MT 11020 | 0.0015 | 2.5° |
| MT 11030 | 0.0020 | 3.0° |
| MT 11040 | 0.0030 | 4.5° |
| MT 11050 | 0.0045 | 6.5° |
| MT 11060 | 0.0030 | 4.5° |
Mold Surface Texture Samples
To better understand and choose the right mold surface texture, manufacturers often use mold surface texture samples as references.
There are generally two types of samples: metal and plastic, with plastic being more common because it directly reflects the final appearance on plastic parts.
Common texture standards include SPI, VDI 3400, and MT, and many vendors offer corresponding sample templates. Most vendors provide samples in standard colors and materials, usually ABS.
However, some vendors can offer a wider range of colors and materials, such as PP and ABS, and may even create custom samples based on specific requirements—though this is typically only necessary for specialized projects.
Conclusion
For most users, the most common types of mold surface fnishes include polished, sand-textured, and brushed finishes. Thus, when selecting mold surface treatments, users typically need to choose one of these three types and determine the required roughness level.
From this perspective, the application of the SPI and VDI standards is relatively straightforward and user-friendly, as they provide clear guidelines that help users easily choose the appropriate surface finishing type and roughness level.
If your requirements are more specific or unique, then you should opt for the solutions provided by MT, or seek out relevant mold factories or design firms, as they will offer more personalized surface texture design solutions.
FAQ
The choice depends on the type of surface texture you want for your product.
- Mirror or high-gloss surfaces – typically specified using SPI A1–A3
- Brushed or semi-polished finishes – usually SPI B1–B3 or C1–C3
- Matte or sand-like textures – often specified using VDI 3400 grades, SPI D1–D3 or MT110 series
- Decorative or patterned surfaces – usually provided by MT (Mold-Tech) or other surface texturing manufacturers
Each standard focuses on a different aspect of mold surface finishing, so the selection depends on the visual effect and functional requirements of the product.
Yes. If you want to be more precise about the surface texture of your product, using samples is highly recommended.
Commercially available SPI and VDI 3400 texture sample plates are widely used in the industry. These samples usually have common textures applied to plastic plaques or metal blocks, allowing designers and engineers to visually compare and feel the surface.
Some sample kits are also available in different materials and colors, which helps simulate the final appearance of molded parts more accurately.
A high mirror-polish finish typically has a roughness of about Ra 0.025–0.05 μm, while ultra-high mirror finishes may be even smoother.
These finishes are usually specified using SPI A grades, especially SPI A1, rather than VDI grades.
Not exactly.
VDI surfaces often look similar to sand-textured finishes, but VDI 3400 is not specifically a sand texture standard. It is better understood as a surface roughness grading system, commonly used to define matte textures produced by processes such as EDM.
Mold surface textures can be created using a variety of processes, which are generally grouped into two categories: additive and subtractive technologies.
The two main additive processes are:
- Electroplating
- Electroforming
Most other mold texturing methods are subtractive, meaning they modify the surface by removing or reshaping a thin layer of material.
Sandblasting is a special case: it does not remove material in the same way as cutting or etching, but the mold surface usually needs to be ground and polished beforehand to achieve a more uniform finish.
For subtractive texturing processes, most textures can be repaired or modified. However, doing so will usually remove an additional layer of material, which may slightly reduce the mold dimensions (which will subsequently increase the sizes of the plastic part).
For additive processes, repairing or modifying the texture is much more difficult and may often be impossible.
Not necessarily. An extremely smooth or mirror-polished surface can sometimes make demolding more difficult because it may create a vacuum or suction effect between the part and the mold. This is especially true for large surface areas or deep cavity shapes.
In many cases, a light textured finish is more suitable because it can help improve mold release while still providing a clean and controlled surface appearance.
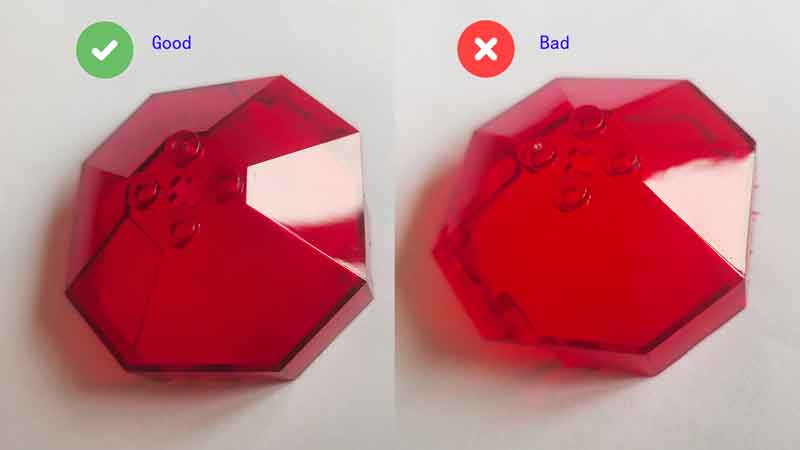
Achieving a high-quality mirror finish requires very precise mold machining and careful preparation before polishing.
The mold surface should be as smooth as possible before the final polishing process. This reduces the amount of manual polishing required. Since manual polishing can be difficult to control evenly across the entire surface, excessive polishing may create uneven micro-surfaces.
These irregularities can distort reflected images on the polished surface, making the mirror finish appear warped or inconsistent.