Table of Contents
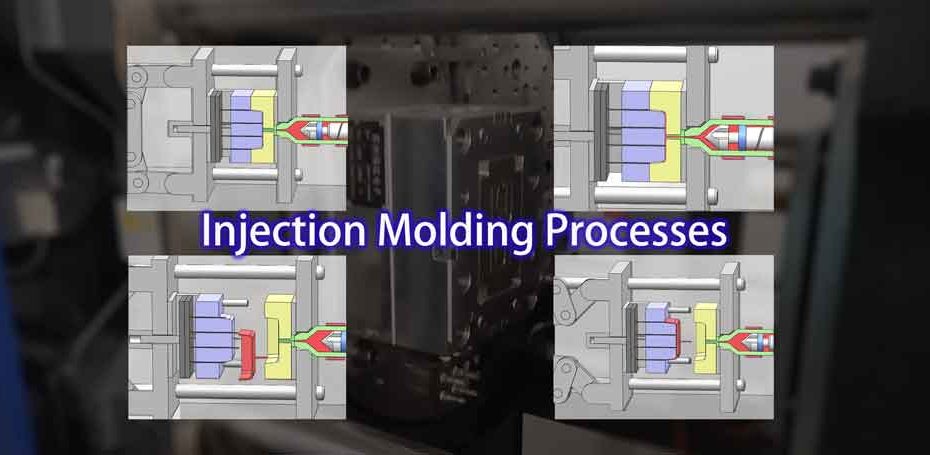
ToggleIntroduction to the Injection Molding Process Steps
Injection molding, often referred to simply as “molding,” is a fundamental manufacturing process used to create plastic products. In this method, plastic particles are heated until they become a liquid, then injected into a mold’s cavity through an injection molding machine’s nozzle. Once inside the mold, the molten plastic cools and solidifies, taking on the shape of the mold cavity.
This versatile process allows for the creation of intricate and complex shapes that would be time-consuming or even impossible to achieve with other manufacturing methods.
In this article, we’ll break down the injection molding process into four simple steps to make it easily understandable for beginners. Let’s dive in.

1. The Mold Clamping
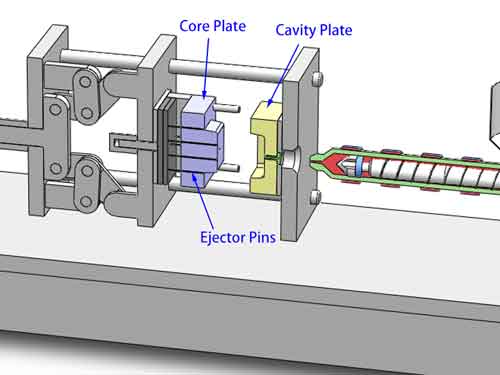
The first step in the injection molding process is mold clamping. During this stage, the lower mold, which is initially positioned on the injection molding machine, moves forward and firmly closes with the upper mold. When the two molds come together, the core and cavity within them create a hollow space that will shape the final product.
It’s crucial to note that, at this point, the injection molding machine exerts a significant mold clamping force. This force ensures that the upper and lower molds remain tightly sealed, preventing even the tiniest gaps from appearing, especially under the intense injection pressure that comes later in the process. This secure closure is essential for the success of the injection molding procedure.

2. Injection and Pressure Packing
In the injection molding process, the molten plastic is forcefully injected into the mold cavity by the injection molding machine, filling the entire space under substantial pressure. Once filled, the injection molding machine maintains a specific injection pressure to compensate for the volume loss caused by the natural shrinkage of the cooling and solidifying plastic.
Normally, the ideal range for injection molding pressure with various plastics falls below 80-100 MPa. Things start to get more challenging in the 100-120 MPa range, and when it goes beyond 120-150 MPa, it becomes significantly more demanding.
Injection pressure serves as an indicator of the effort required to fill the entire cavity. It’s closely tied to factors like the part’s overall size, wall thickness, and height.
Additionally, controlling the injection speed at different stages is something of an art, crucial for achieving high-quality final parts.
However, it’s important to note that when the sprue, runner, and main gate begin to solidify, it becomes impossible to introduce more material into the mold. Consequently, even with pressure packing, some degree of shrinkage remains unavoidable in the finished product.
3. Cooling and Solidification
With the mold securely closed, the molten plastic inside the mold cavity begins to cool and solidify. During this crucial stage, the plastic undergoes a transformation, transitioning from a liquid state to a solid one while naturally shrinking.
The temperature of the mold itself plays a pivotal role in determining the quality of the final product. Typically, mold heaters generate heated oil to raise the mold’s temperature, while cold water is used to lower it. In some rare cases, both heating and cooling methods are employed alternatively in one production cycle to achieve precise temperature control and optimal product quality.
The duration of the cooling and solidifying process is a critical parameter that directly affects the quality of the finished product. It determines whether the product is fully formed and ensures subtle size differences are minimized.
Once the plastic parts have adequately cooled and solidified within the mold, it’s time to proceed to the next step: opening the mold and removing the newly formed components.
Tip: Cooling Phase Is the Longiest of the Four Steps
In the cycle of injection molding production including these four steps, the cooling process stands out as the most time-consuming, making it a pivotal factor in the overall efficiency. The thickness of the plastic part’s walls plays a crucial role in determining the duration of the cooling phase.
In many instances, it is the sprue, often the thickest region, that becomes the primary factor contributing to extended cooling times. In such scenarios, the implementation of a hot runner system can prove highly beneficial, as it effectively eliminates the need for cooling the sprue, optimizing the production timeline.
4. Mold Opening and Part Ejection
In the next phase of the injection molding process, we have the mold opening and part ejection.
In contrast to the mold clamping phase, the lower mold now moves backward, separating from the upper mold. Simultaneously, an essential component known as the ejector pin comes into action, pushing the newly formed product out of the lower mold.
The ejector pin plays a pivotal role in ensuring the successful removal of the product, especially when dealing with items featuring small draft angles and high walls. Without the ejector pin, some products might become trapped within the mold, making removal virtually impossible without damaging them.
Furthermore, it’s crucial to ensure that the product does not stick to the upper mold because, typically, the upper mold lacks an ejection mechanism. Proper ejection ensures a smooth and efficient production process, allowing for the creation of high-quality plastic components.
Conclusion
In summary, the theory of the injection molding process is straightforward to grasp. Yet, to consistently produce large quantities of high-quality products, precise control over numerous parameters within the injection molding process is essential. Key factors that demand careful attention include injection temperature, pressure, holding time, and more.
Achieving this level of precision not only hinges on sophisticated equipment but also relies on the expertise and collaboration of skilled engineers and operators with extensive experience in the field. Their knowledge and dedication are indispensable in ensuring the successful execution of the injection molding process and the production of top-notch plastic components.
Comments are closed.